
If you work in IT (and/or you’ve ever read this site), you’ve probably created USB Bootable Media to reinstall an Operating System before. With Windows (since 2015 specifically), a wonderful tool called Rufus has made this process much simpler than it used to be, with a 4(ish) click process to go from downloaded ISO to bootable USB drive in a snap. Unfortunately, Microsoft made things a bit more difficult for us with Windows 10, Version 1909.
As I’ve mentioned in previous articles (here, here, and here), UEFI bootable media (at least with Windows and their Native Installers) requires a single FAT32 partition on the flash drive. This was difficult back in the Windows 8.1 days because our custom built compressed WIM files regularly exceeded 4 GB – the max file size for FAT32. To circumvent that restriction, I previously utilized some tricks with the Microsoft Deployment Toolkit to leverage (2) Flash Drives, one with the bootable media and the other with the WIM file. This worked.. but it was very clunky. Fast forward to 2015, we (once again) were provided with the ability to “Split WIMs” – or more simply – break these files up into multiple (<4GB) pieces, allowing them to fit on a single FAT32 (bootable UEFI) partition. From this point forward, creating custom USB images became much easier. But what’s all this have to do with Windows 10, Version 1909 and Secure Boot?
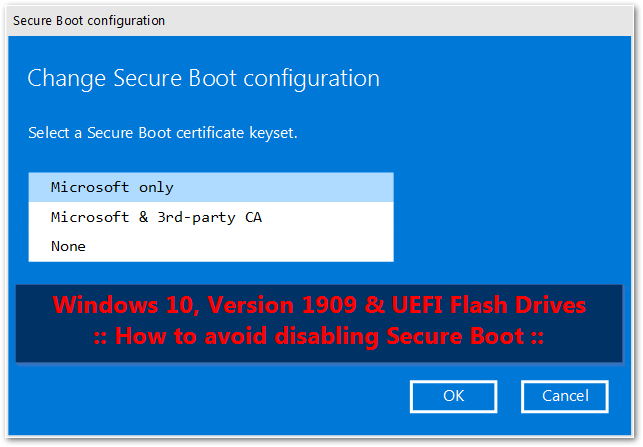
In Microsoft’s infinite wisdom, the latest MSDN downloads of v.1909 have a single WIM file exceeding 4 GB. Why? Consider me stumped. Microsoft could have split this WIM up for us in advance, but they chose not to. But where does Secure Boot come into play? If you download the latest Rufus, and point it to a fresh download of v.1909 from MSDN, you will be presented with the following screenshot:
If you click START and proceed, once complete you will be presented with the following prompt:

Clicking More Information will take you here: https://github.com/pbatard/rufus/wiki/FAQ#Why_do_I_need_to_disable_Secure_Boot_to_use_UEFINTFS
So, what happened here? Long story short, Rufus is using a system called UEFI:NTFS to create this boot drive. Please check out and read their GitHub as it explains in detail what it does and why it exists (for this audience: its existence is to allow UEFI boot via an NTFS partition).
But why the need to disable Secure Boot? Again, check out this link for details.
(TL;DR – It’s not UEFI:NTFS’ fault. It’s Microsoft politics.) Got it? Great.
But isn’t the point of this article to explain how to bypass such a requirement? Read on.
Get to the point, already!
How can I skip the “Disable Secure Boot” requirement?
If you’ve followed one of my Customized Windows build guides before, you already know the answer to this. We’re going to do the following:
- Extract the ISO
- Use DISM to split the WIM into 3.8 GB parts
- Delete the original WIM
- Use OSCDIMG to repackage the ISO
- Run Rufus again, pointing to the new ISO
- Successfully create a FAT32 Windows 10 v.1909 UEFI Bootable USB Drive
Let’s do it.
Acquiring the necessary Tools
- Download the Windows 10 Version 1909 ISO from MSDN. In my case, I’m going to download the “Business Edition”. The latest build posted at the time of this article’s writing is named “en_windows_10_business_editions_version_1909_updated_dec_2019_x64_dvd_d16597e9.iso”
- Download the Windows Assessment and Deployment Kit (ADK) for Windows 10 Version 1903 (yes, 1903) from here.
Preparing your environment
- Open the Windows ADK for Windows 10 installer.
- Select and install
Deployment Tools
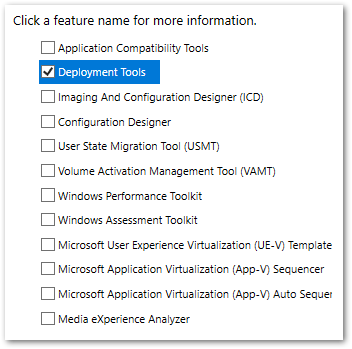
- Select and install
Extracting the ISO
- Double click the Windows 10 Version 1909 ISO to mount it
- Open the recently mounted ISO Drive Letter
(D:\ “CPBA_X64FRE_EN-US_DV9” in my case) CTRL+A(to select all) andCTRL+C(to copy)- Create a new folder off the C:\ drive named 1909Working
- Navigate to C:\1909Working\ and
CTRL+V(to paste)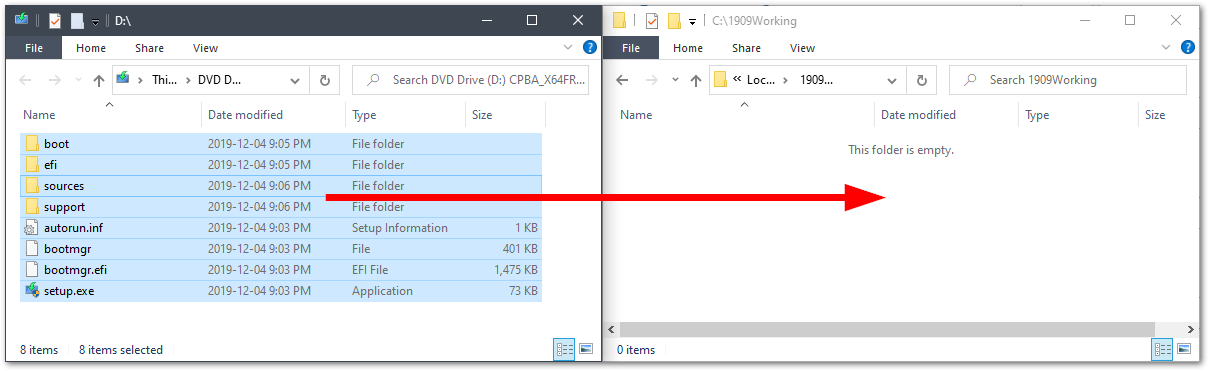
Splitting the WIM
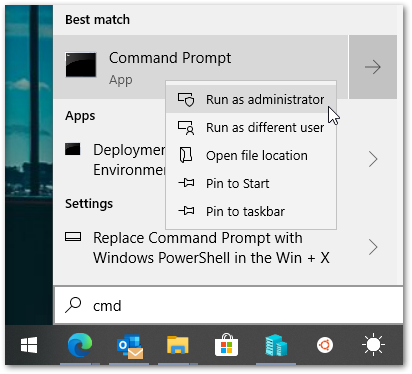
- Open a Command Prompt as Admin
WinKey(to open the start menu) and typeCMD- Right Click Command Prompt and select Run As Administrator > Accept the UAC Prompt
- Change Directory to
C:\1909Working\sources\ - Run the following command to split the WIM into ~3.8GB pieces:
dism /Split-Image /ImageFile:install.wim /SWMFile:install.swm /FileSize:3800 - Delete the original WIM with the following command:
del /f /q install.wim - Change Directory to
C:\Program Files (x86)\Windows Kits\10\Assessment and Deployment Kit\Deployment Tools\amd64\Oscdimg\ - Run the following command to create a new ISO:
oscdimg -m -o -u2 -lCPBA_X64FRE_EN-US_DV9 -udfver102 -bootdata:2#p0,e,bC:\1909Working\boot\etfsboot.com#pEF,e,bC:\1909Working\efi\microsoft\boot\efisys.bin C:\1909Working\ C:\en_windows_10_business_editions_version_1909-fixed.iso - Find your newly created ISO located at: C:\en_windows_10_business_editions_version_1909-fixed.iso
- You may close all windows at this point and clean up (remove) the C:\1909Working\ directory.

Writing the new (UEFI capable) ISO to a Flash Drive
- Insert your USB flash drive
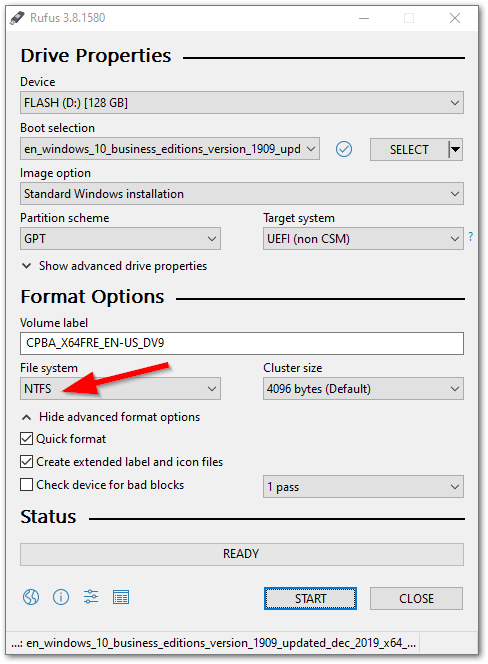
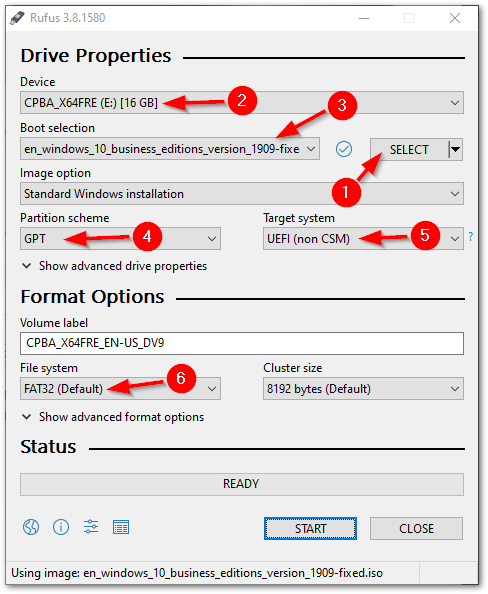
- Download Rufus and load up your new ISO:
- Click the Select button and navigate to C:\ and select
en_windows_10_business_editions_version_1909-fixed.iso - Ensure your Target Flash Drive is selected under Device
- Ensure the Boot selection is listed as
en_windows_10_business_editions_version_1909-fixed.iso - Ensure the GPT is selected Partition scheme
- Ensure the UEFI (non CSM) is pre-selected under Target system
- Ensure FAT32 is selected under File system
- Click Start
- Click OK on the warning prompt if you understand that all data on the flash drive will be destroyed
- Click the Select button and navigate to C:\ and select
Congratulations! You’ve just circumvented a silly Microsoft decision that made performing USB reimages with a UEFI device more difficult than it needed to be! Go forth and image your devices without the need to disable Secure Boot!
It’s been too long! I should have a new walkthrough once Version 2004 drops in the next few weeks. We’ll have to see if Microsoft makes that version’s WIM greater than 4GB. 🙂